
Camp Loft Bed with Stair, Junior Height
Submitted by Ana White on Wed, 2012-07-18 16:30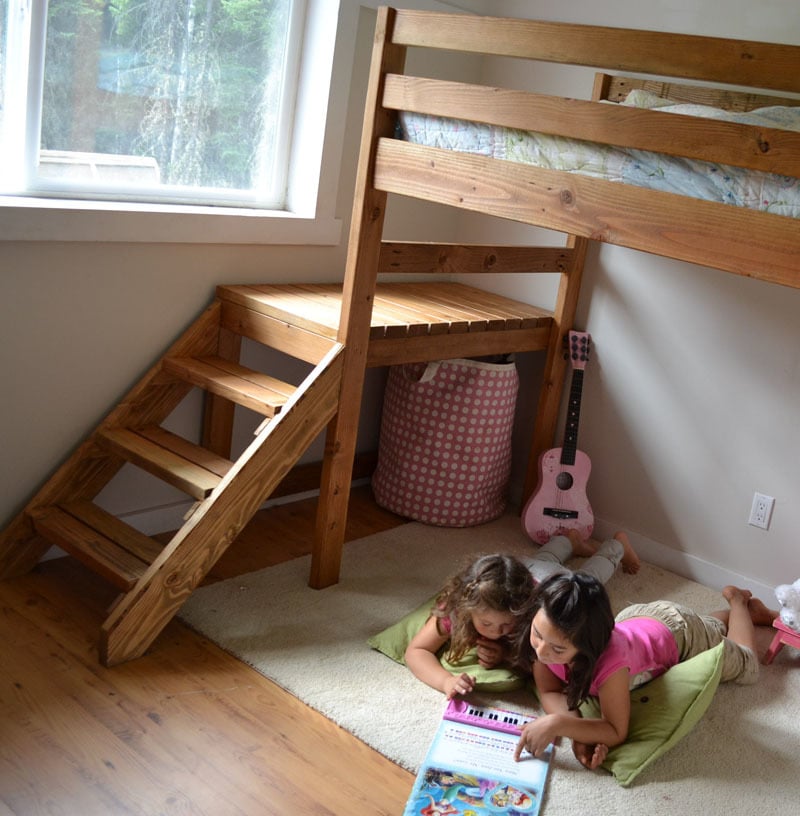
Additional Photos


About Project
Loft bed plans with stairs. Junior height loft bed plans free from Ana-White.com
Author Notes:
Before we get to a plan, I simply must warn you.
Do not build this bed if you want any of the following to happen:
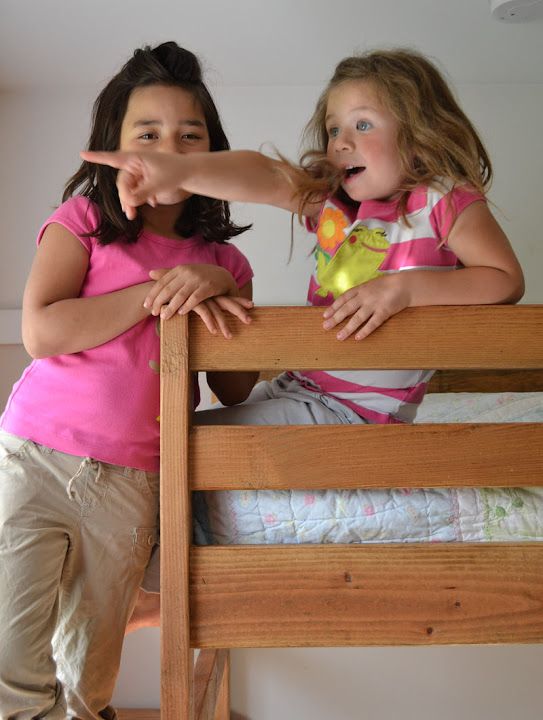
Your kids to play independently in their room for hours and hours and hours ... if you build this bed, you will see your kids 30-40% less ...
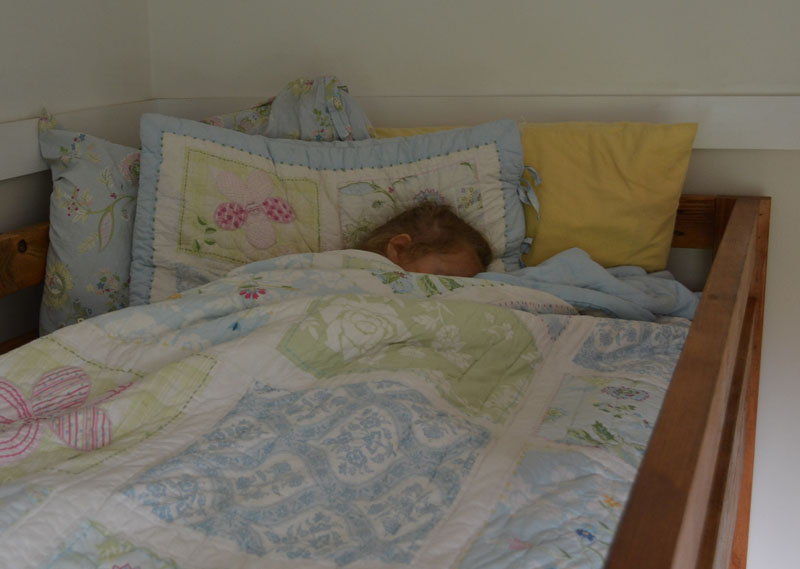
Do NOT build this bed if you want your kids to take a nap, all by themselves ... It's like a protected nest up there, with rails on all sides, and easy access with stairs. They just climb up there and go to sleep. No snuggling required.
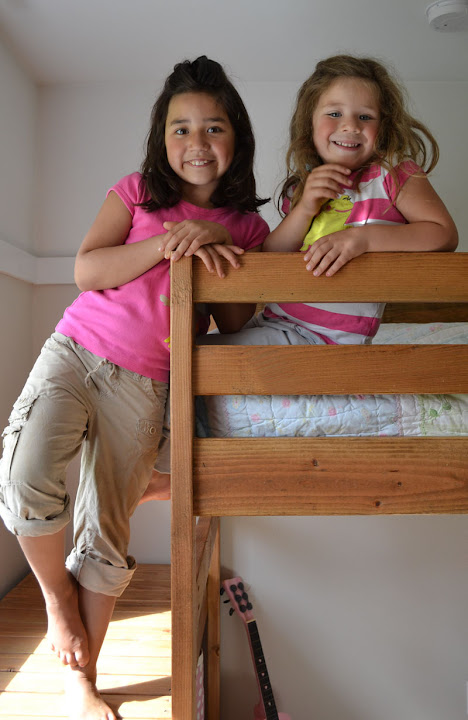
If you build this bed, you will miss out on lots of smiles and laughter and pretend play. And when you come try to join in, they will start giggling and say, Mom! Leave us alone, we're playing horses! Or store or house or pretending the stair platform is a stage.
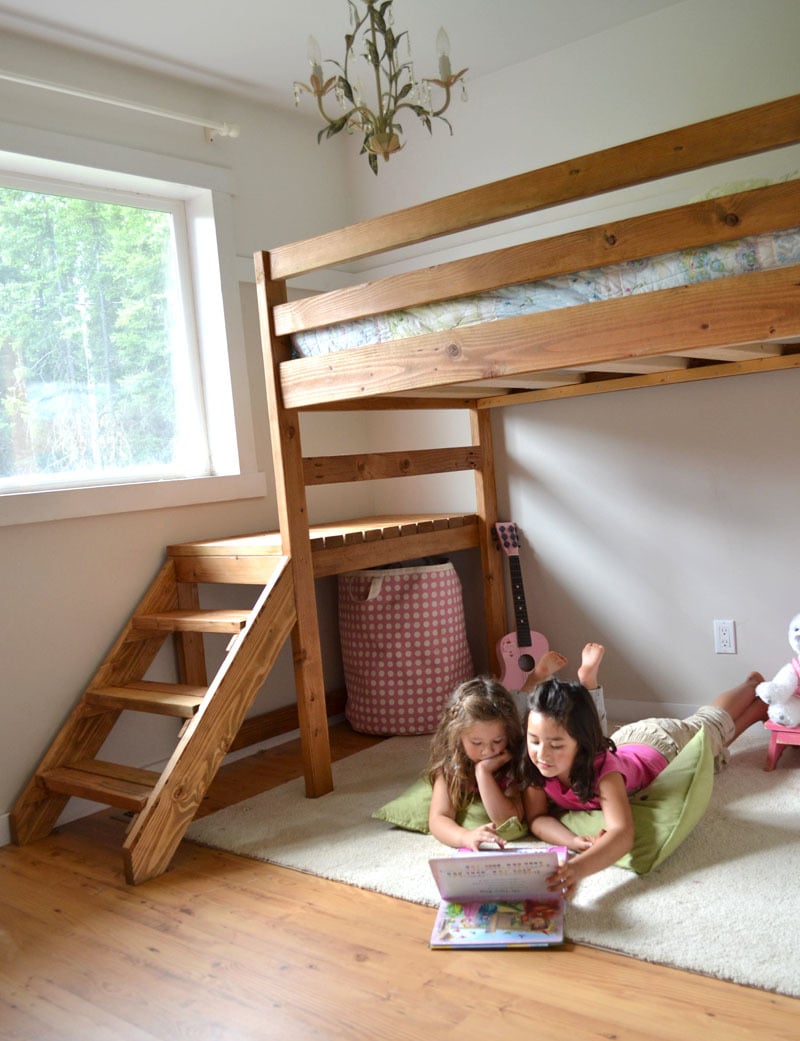
The only reason I built this bed was because the room is so tiny (8x8 with small closet) it was very difficult for the kids to play, and then put their things away in a space the size of a short hallway. We'd done a loft bed years ago, but the loft bed was only accessible by children, and there was no where for guests to sleep in our house.
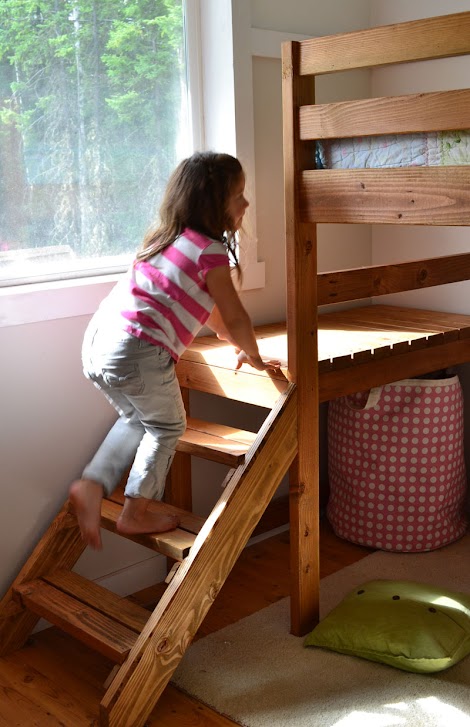
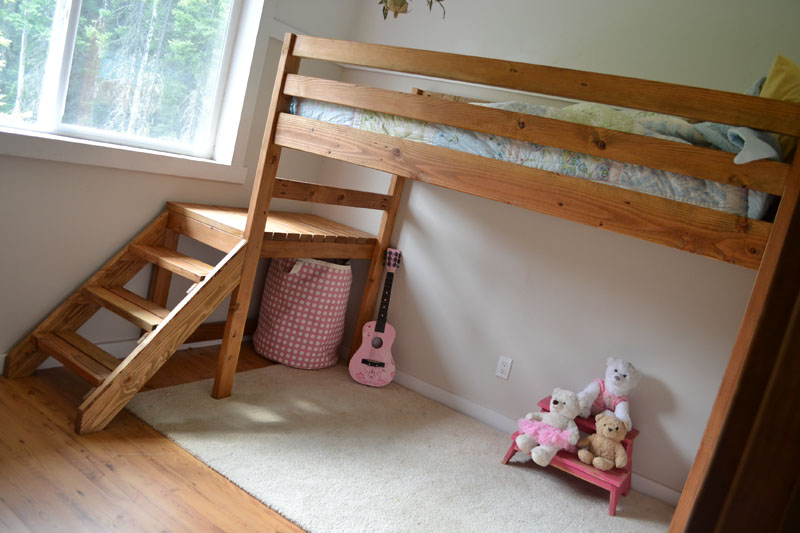
So we needed a loft bed WITH STAIRS that is sturdy and easy to access in a TINY room. With the window right there, I just didn't know how to make it work. And then one day, I realized that the stairs do NOT need to go all the way up to the bed. They only need to go up about 18" to 24" (normal height of kids mattress above floor) below the mattress.
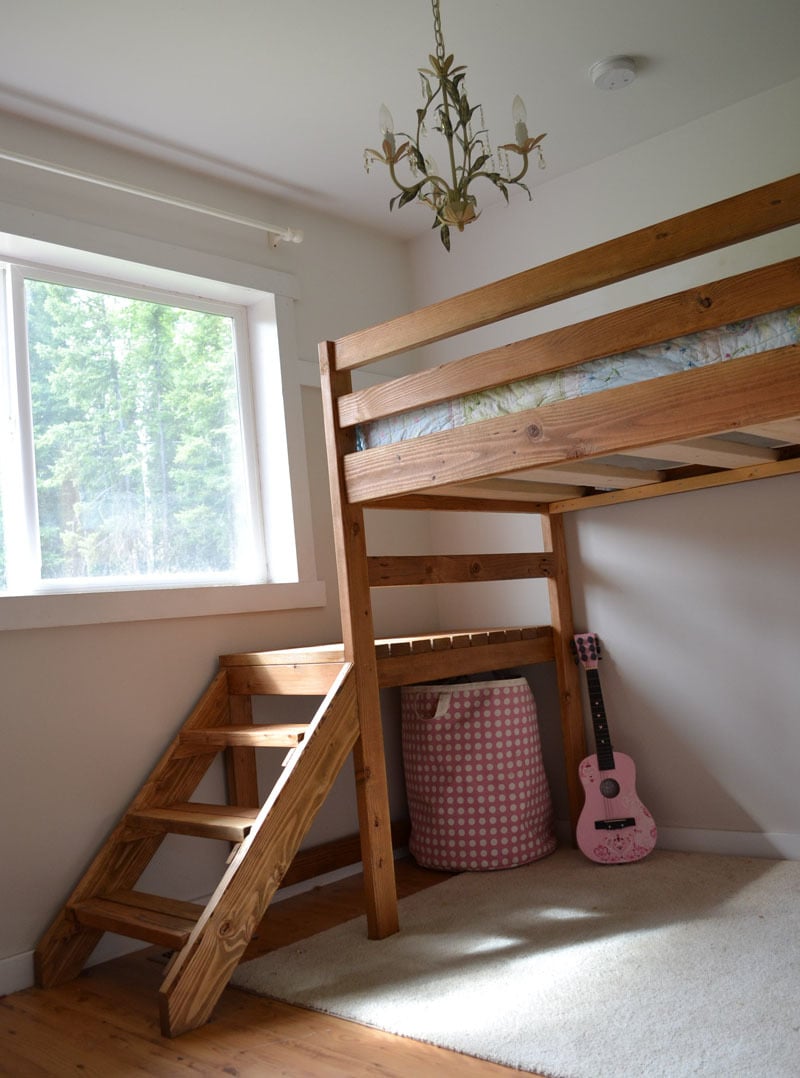
The window was previously the obstacle in the way of building stairs. Now it's entertainment for the kids as they watch the chickens run around the back yard.
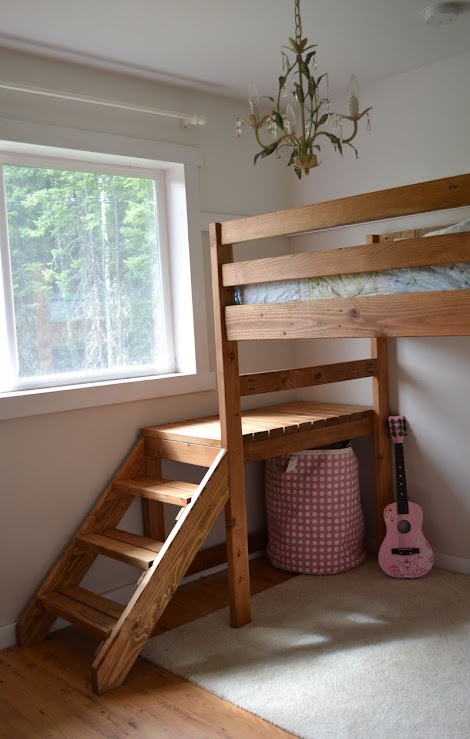
Under the bed, no storage is lost. I've been debating adding some custom sized rolling toy bins but the giant canvas bag is doing fine holding pillows, blankets and stuffed animals.

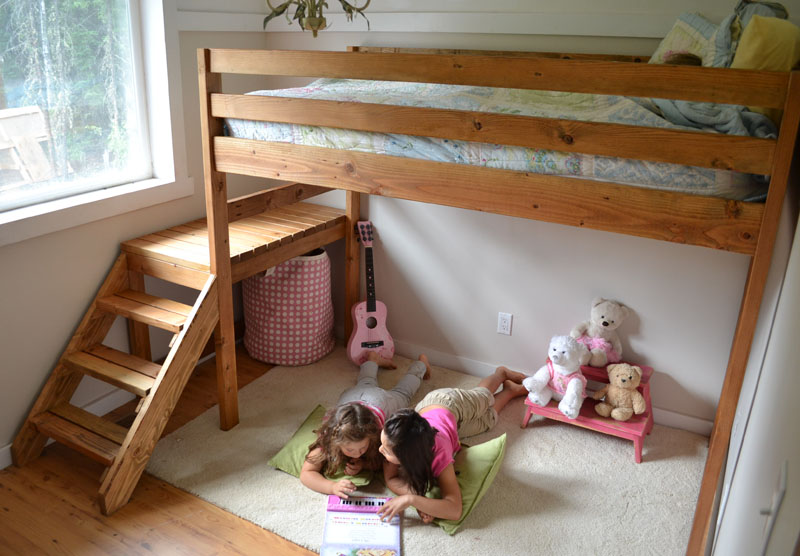
It is no exaggeration to say they play in their ALL DAY. I'm considering making a felt curtain for the front too ...

The best part about this bed is how easy and inexpensive it is to make. That's all 2x4s and 2x6s bringing the total cost of lumber up to about $50!!!
I am so excited about building this for Matt. I think i will do it this weekend so he will have a surprise when he comes back from Ohio with mamaw and papaw.

Do not build this bed if you want any of the following to happen:
Your kids to play independently in their room for hours and hours and hours ... if you build this bed, you will see your kids 30-40% less ...
Do NOT build this bed if you want your kids to take a nap, all by themselves ... It's like a protected nest up there, with rails on all sides, and easy access with stairs. They just climb up there and go to sleep. No snuggling required.
If you build this bed, you will miss out on lots of smiles and laughter and pretend play. And when you come try to join in, they will start giggling and say, Mom! Leave us alone, we're playing horses! Or store or house or pretending the stair platform is a stage.
The only reason I built this bed was because the room is so tiny (8x8 with small closet) it was very difficult for the kids to play, and then put their things away in a space the size of a short hallway. We'd done a loft bed years ago, but the loft bed was only accessible by children, and there was no where for guests to sleep in our house.
So we needed a loft bed WITH STAIRS that is sturdy and easy to access in a TINY room. With the window right there, I just didn't know how to make it work. And then one day, I realized that the stairs do NOT need to go all the way up to the bed. They only need to go up about 18" to 24" (normal height of kids mattress above floor) below the mattress.
The window was previously the obstacle in the way of building stairs. Now it's entertainment for the kids as they watch the chickens run around the back yard.
Under the bed, no storage is lost. I've been debating adding some custom sized rolling toy bins but the giant canvas bag is doing fine holding pillows, blankets and stuffed animals.
It is no exaggeration to say they play in their ALL DAY. I'm considering making a felt curtain for the front too ...
The best part about this bed is how easy and inexpensive it is to make. That's all 2x4s and 2x6s bringing the total cost of lumber up to about $50!!!
I am so excited about building this for Matt. I think i will do it this weekend so he will have a surprise when he comes back from Ohio with mamaw and papaw.
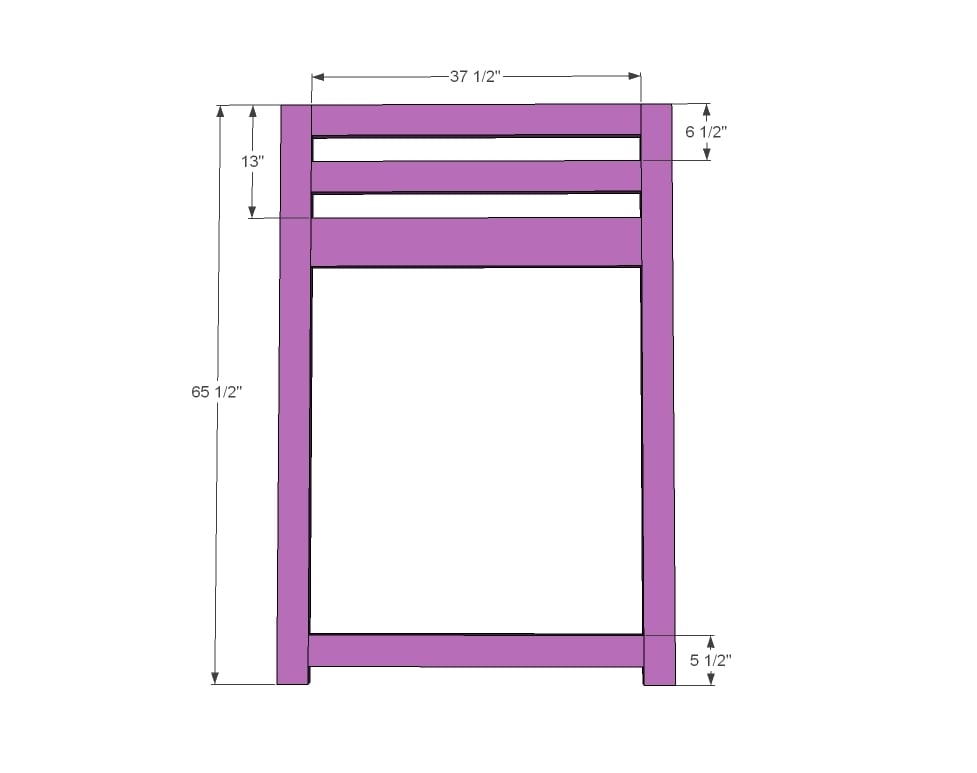
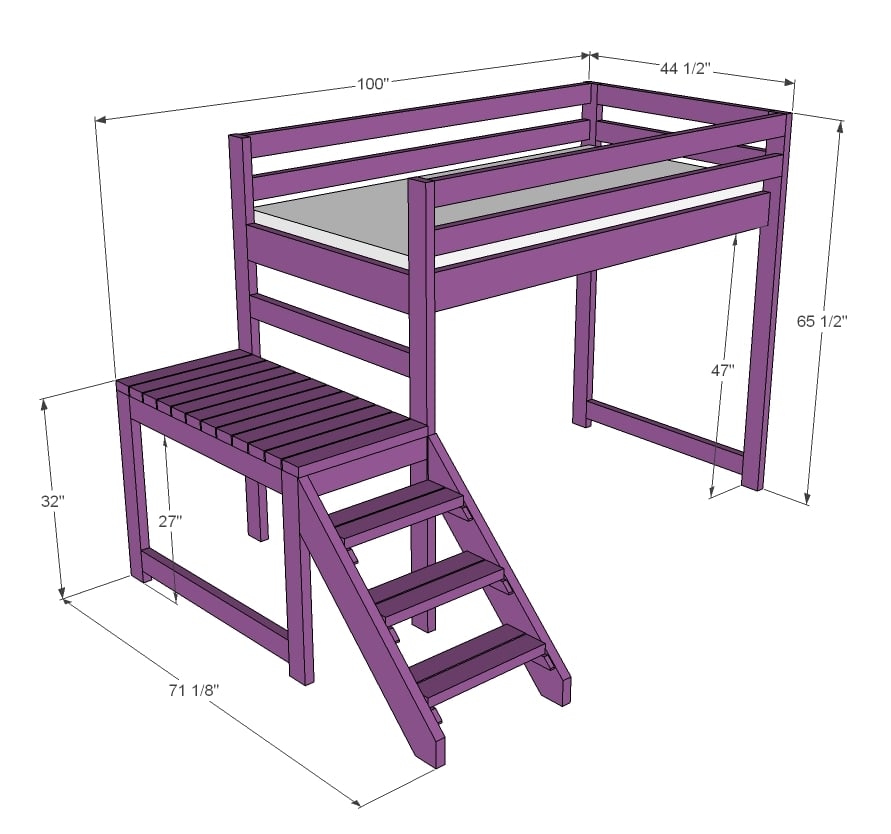
Dimensions
Dimensions:

Dimensions:
Dimensions shown above. Fits twin. Materials and Tools
Shopping List:
14 – 2x4 @ 8 feet long
4 – 2x6 @ 8 feet long
2 – 2x2 @ 8 feet long
1 – 1x2 @ 8 feet long
2 ½” PH screws
4 – 2x6 @ 8 feet long
2 – 2x2 @ 8 feet long
1 – 1x2 @ 8 feet long
2 ½” PH screws
Tools:
measuring tape
square
pencil
safety glasses
hearing protection
drill
circular saw
sander
countersink drill bit
Cut List
Cut List:
4 – 2x4 @ 65 ½”
2 – 2x6 @ 37 ½”
4 – 2x4 @ 37 ½”
4 – 2x4 @ 75”
2 – 2x6 @ 75”
2 – 2x2 @ 75”
2 – 2x4 @ 30 ½”
2 – 2x4 @ 37 ½”
1 – 2x4 @ 41 ½”
2 – 2x4 @ 20 ½”
12 – 2x4 @ 22”
2 – 2x6 @ 43” (both ends cut 45 degrees off square, ends NOT parallel) – to be trimmed down in later steps
6 – 1x2 @ 7 ¾” (both ends cut at 45 degrees off square
6 – 2x4 @ 20 ½”
General Instructions
Please read through the entire plan and all
comments before beginning this project. It is also advisable to review
the Getting Started Section. Take all necessary precautions to build
safely and smartly. Work on a clean level surface, free of
imperfections or debris. Always use straight boards. Check for square
after each step. Always predrill holes before attaching with screws.
Use glue with finish nails for a stronger hold. Wipe excess glue off
bare wood for stained projects, as dried glue will not take stain. Be
safe, have fun, and ask for help if you need it. Good luck!
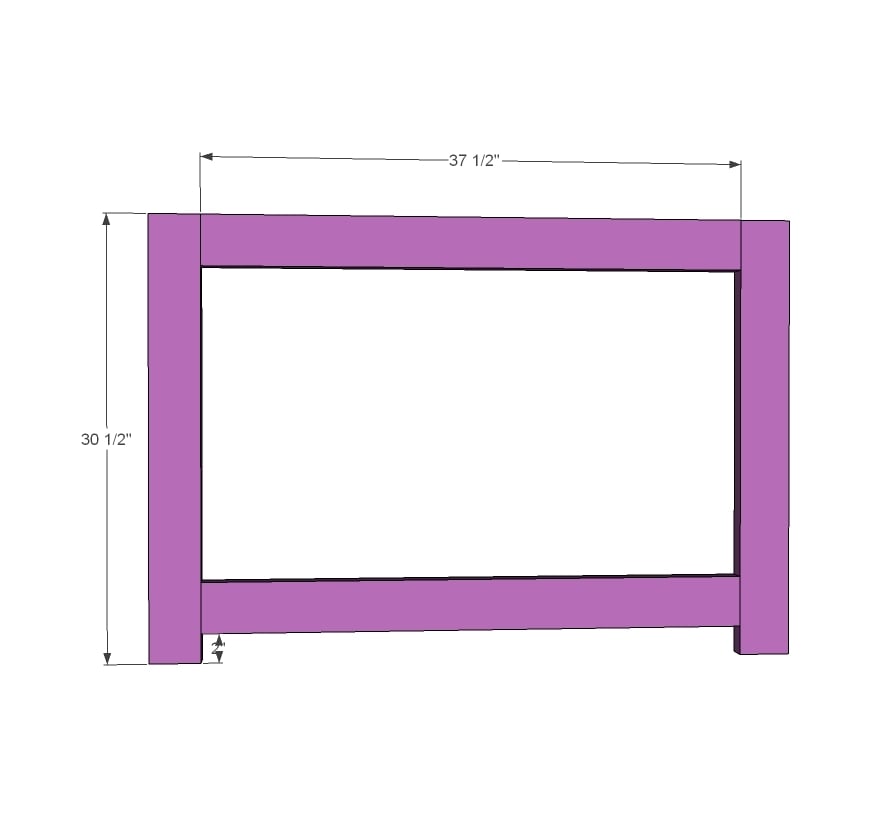
Step 1

Build the ladder end as shown in diagram with 1 1/2" PHs and 2 1/2" PH screws. Use glue to fasten - these joints are permanent.
If you are building this loft bed without the stair platform, add 2x4s all the way down to make a "ladder" for the kids to climb up.
If you are building this loft bed without the stair platform, add 2x4s all the way down to make a "ladder" for the kids to climb up.
Step 2
Build front end of loft bed same as ladder end.
Step 3
Now here's where we skip the glue. To make this
loft bed easy to disassemble, I did not use glue here. The inside width
for the mattress area should be 39", insetting the side rails 1 1/4"
from outsides. I did this so your PH screws have lots of board to grab
into.
This bed has NOT been weight tested or guaranteed. If you feel you need extra support - add metal brackets under the 2x6s.
An alternative method is to attach metal bed brackets directly to the ends if you have those.
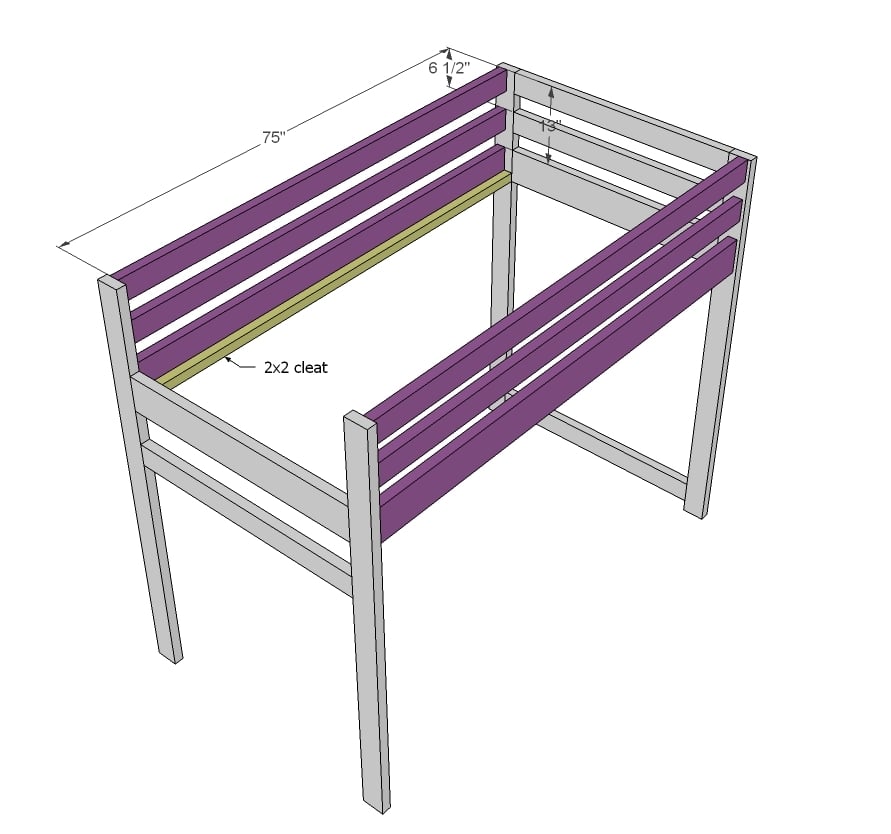
Notice the cleat is added in this step to. I used 2 1/2" screws and glue to attach, screws every 6-8" all the way down.
This bed is designed to work with a bunkie board, but we just used 2x6s cut to length as the bed slats.
This bed has NOT been weight tested or guaranteed. If you feel you need extra support - add metal brackets under the 2x6s.
An alternative method is to attach metal bed brackets directly to the ends if you have those.
Notice the cleat is added in this step to. I used 2 1/2" screws and glue to attach, screws every 6-8" all the way down.
This bed is designed to work with a bunkie board, but we just used 2x6s cut to length as the bed slats.
Step 4
Now we'll start building the stair platform for the loft bed with stairs.
Step 5
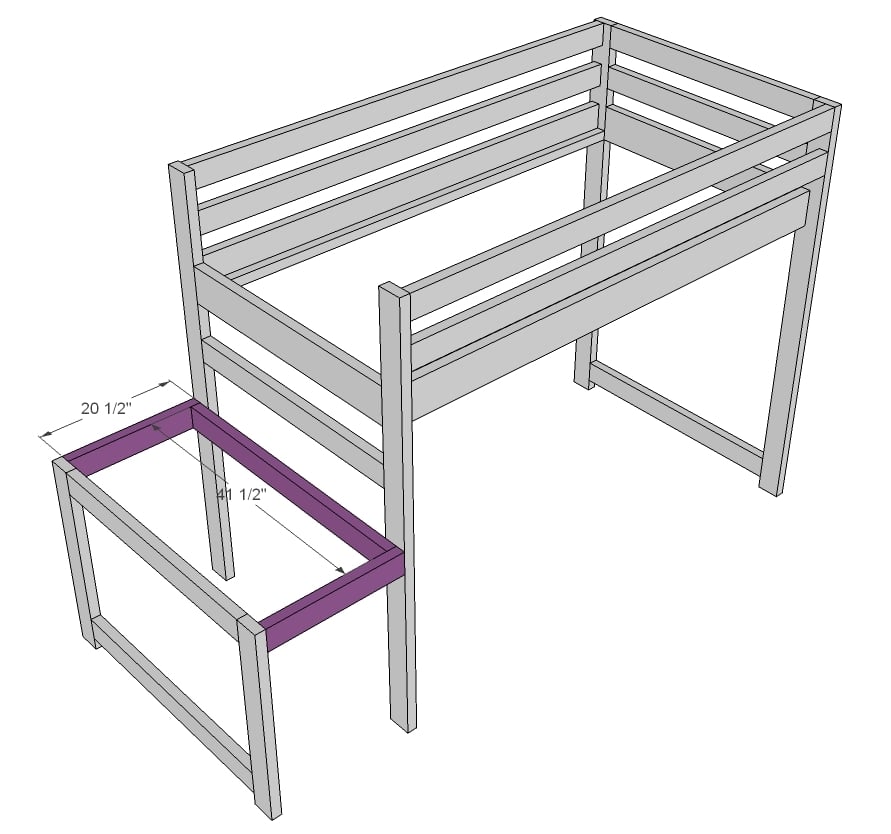
Build the floor framing section and attach to the floor legs. I recommend 1 1/2" PHs and 2 1/2" PH screws and glue here.
Step 6
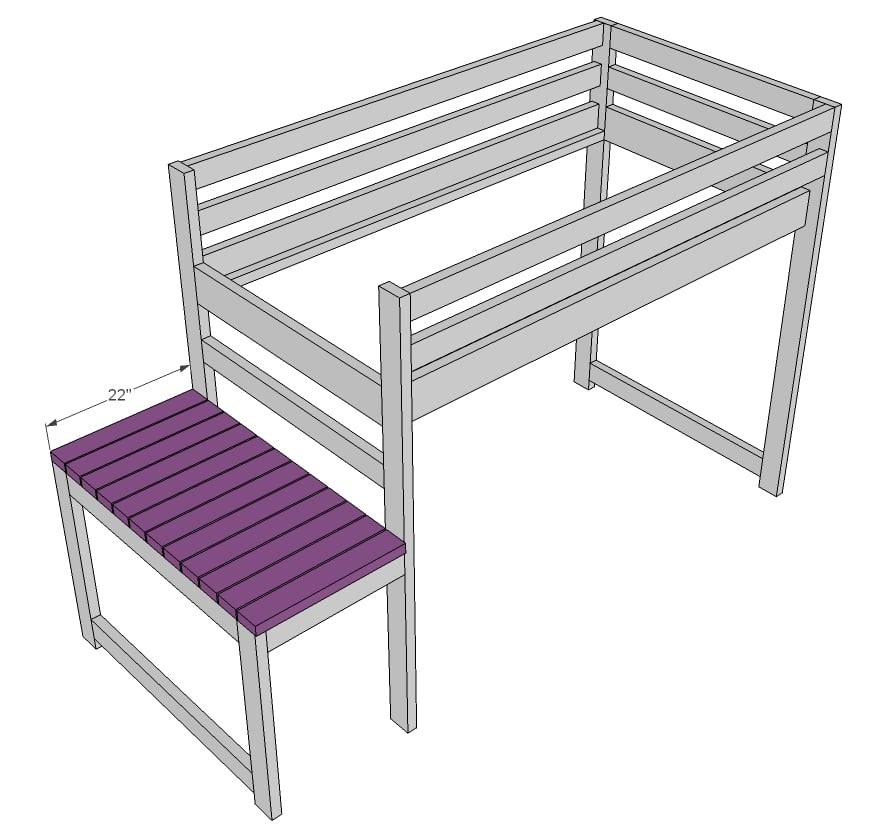
And then the decking is placed on top of the stair platform.
Step 7

The stairs are easy to build - just 45 degree
angles! We went ahead and drilled 1 1/2" PHs along top edge of the
stairs to connect the stairs to the bed later on.
Step 8
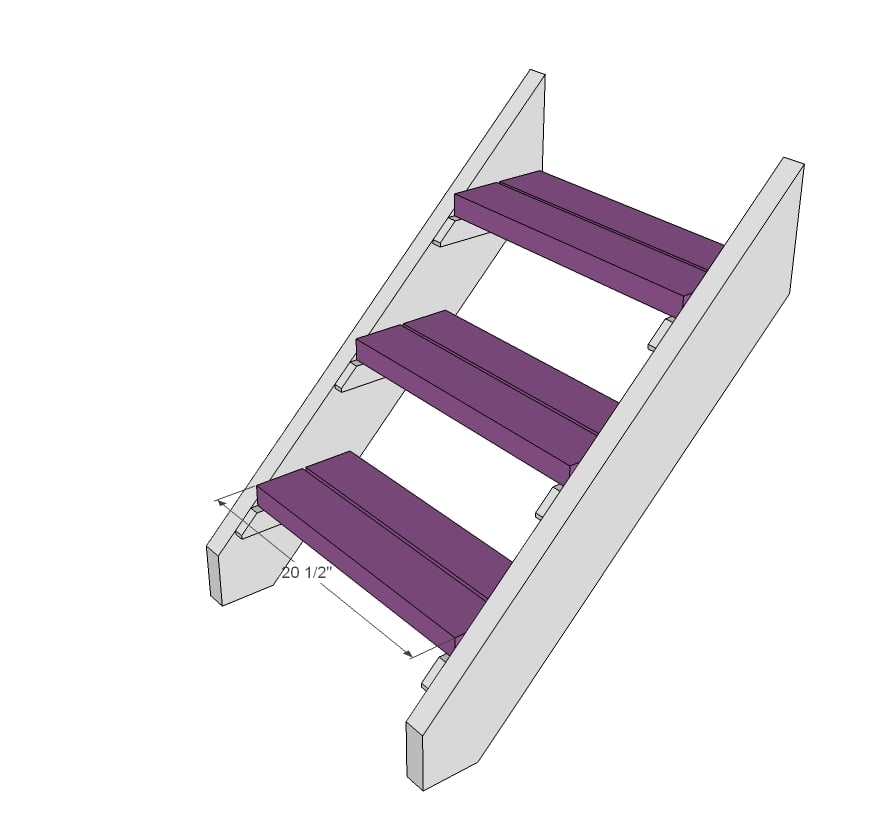
Then we added the stair treads. We also drilled 1
1/2" PHs along ends of the stair treads and attached with 2 1/2" PH
screws just for extra strength. Everything gets glued.
Step 9
The bed was finished outside and then assembled in the room.
TIP: We haven't found our bed needs it, but for extra support, you could add another 2x4 @ 75" (at $2 a 2x4, cheap insurance) to the base of the bed to further support the bottoms.
TIP: We haven't found our bed needs it, but for extra support, you could add another 2x4 @ 75" (at $2 a 2x4, cheap insurance) to the base of the bed to further support the bottoms.
Finishing Instructions
Preparation Instructions:
Fill all holes with wood filler and let dry. Apply
additional coats of wood filler as needed. When wood filler is
completely dry, sand the project in the direction of the wood grain with
120 grit sandpaper. Vacuum sanded project to remove sanding residue.
Remove all sanding residue on work surfaces as well. Wipe project clean
with damp cloth.
It is always recommended to apply a test coat on a hidden area or scrap
piece to ensure color evenness and adhesion. Use primer or wood
conditioner as needed.
1 comment:
I called and got a quote at menards. 54 dollars! Woop!
Post a Comment